
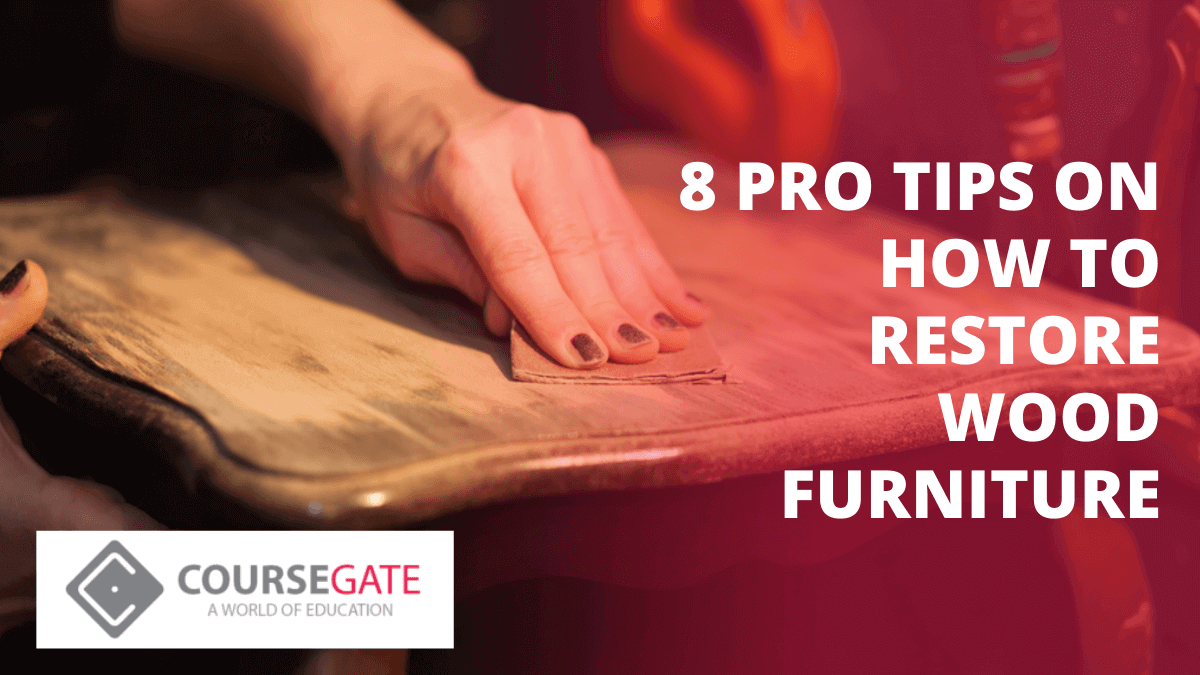
Today we are here to share 8 pro-tips with you on how to restore wood furniture. We will also discuss all the necessary facts you should know beforehand. We assume if you are here, then this is exactly what you are looking for.
Most of the time, people often see restoration as repairing. But in reality, there is a considerable contrast between these two terms. For example, furniture restoration makes furniture look like a new piece. It even can mean maintaining the position of furniture so that it does not worsen any further.
Restoration is a pretty simple procedure. It also removes grime or dirt from the furniture’s surface. And, if the furniture is very old or antique, then the process may involve replacing some parts.
Usually, people restore their furniture when they want to sell that piece. Thus, they might want to restore the functionality or appearance of the piece.
So, for those who are not familiar with this term yet, you are in the right place. Here we present you everything about furniture restoration one needs to know.
Table of Contents
What are The Benefits of Furniture Restoration?
When it comes to the benefits of restoration of old antiques, there is a long list of the benefits. Unfortunately, not wanting to let go of cherished antique pieces can create conflicts. And then the restoration comes along to the rescue to help them out of the dilemma.
Furniture restoration is also a fruitful career. You can buy the materials at a low price and sell them at a favourable amount after restoration.
Below we mentioned some of the benefits that will assist you in deciding, in case you are still suspicious :
- Restoration is the best way to bring your lovely wooden piece back to life if it got damaged over time. And that too, without forcing yourself to toss it away.
- Fixing a piece of broken furniture and keeping it can preserve your emotional values. Especially if you have got it from your heritage.
- Most of the time, restoring it can turn out to be more budget-friendly than replacing the item.
- Furniture restoration is beneficial. It restores the actual value of the object, even increases it more.
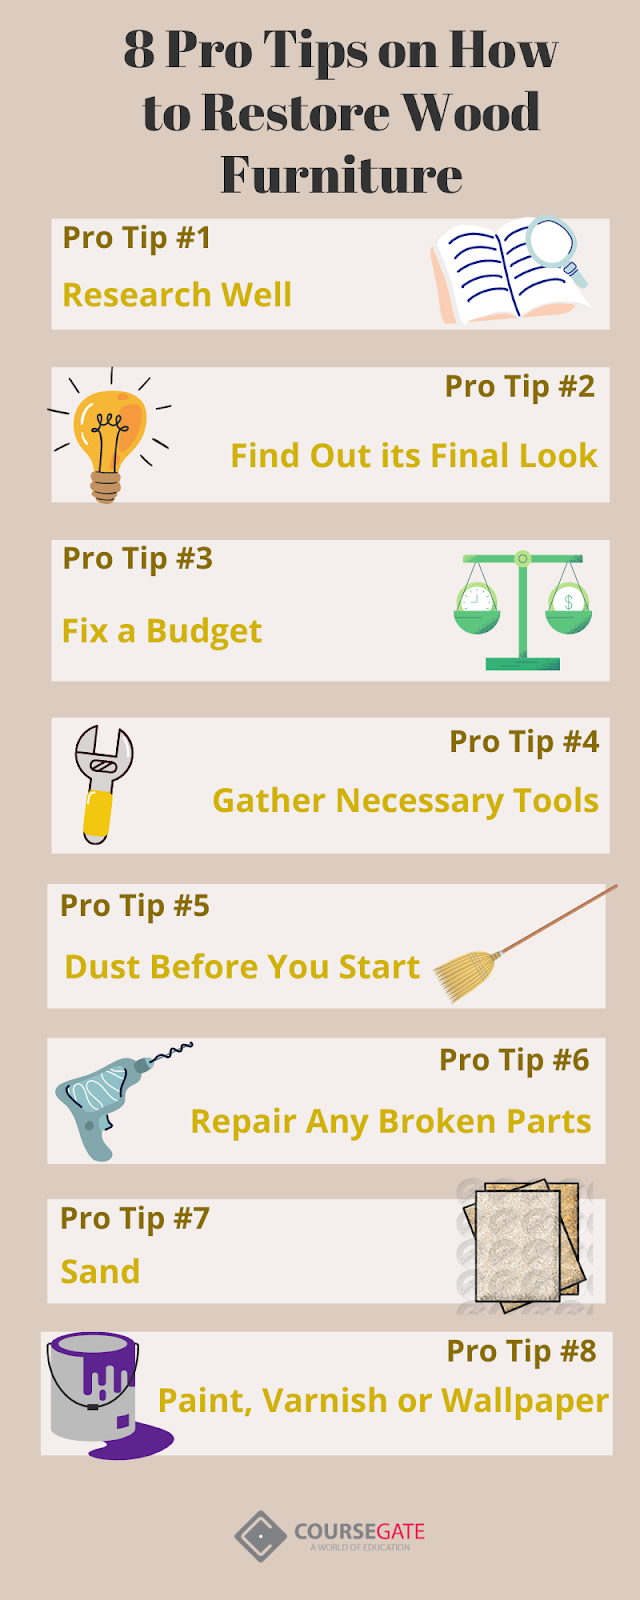
8 Pro Tips on How to Restore Wood Furniture
If you’re looking to restore old wooden furniture and allow the timber to shine out again, you’ll need these step-by-step instructions from experts.
You can bring back the radiance of home furnishings and antiques by restoring them. But first, you must know how to restore faded wood furniture correctly. Thus, restoring a piece of wood furniture is quite an exciting project.
We recommend a Diploma in Furniture Restoration to those who want to take it as a profession for the long run. CourseGate offers Furniture Restoration Training to teach you all the techniques to rebuild and redesign old furniture. It also teaches you potential professional skills by the professionals.
Whether your question is how to restore wood patio furniture or how to restore mid-century wood furniture, both the question begins with HOW. So let’s find out how.
Read on to know 8 pro-tips on how to restore wood furniture step by step:
Pro Tip #1 Research Well
Research your wooden furniture for labels or marks that can state its origin. Consult a professional before proceeding if you assume it’s worth some money. Keep records by taking photos or marking tags. Hold off on stripping or sanding until you know what exactly you have in hand. Because eliminating a collectable antique’s finish could lessen or void its value.
Do not worry if you’re not a specialist in furniture restoring. It’s easy to look for a few significant signs of age:
- First, feel underneath if you can find dry and dull furniture exterior corners.
- Then, look at the threads by partially unscrewing a screw. If they have variable widths between them, then there is a chance for that piece to be pretty old.
- Last but not least, remove a drawer to see if it has dovetail hinges.
The furniture is likely old and very well-made if you find any of these. And you would like to have a professional antique appraiser to value the piece for you.
Pro Tip #2 Find Out Its Final Look
You might think that the colour of that table you pulled out will match your room. But later on, you discovered its true colour after restoration begins. And guess what, it doesn’t match with the rest of your furniture at all.
Trust us. It happens to every new restorer.
Fortunately, you can get an idea of the actual grain’s colour with a bit of analysis. Take a peek at the spots that are usually protected from daily sunlight and dust, such as the back of a drawer front. It will give you a view of what the finished outcome will look like.
Pro Tip #3 Fix The Budget
Once you’ve determined whether you want to keep it for yourself or sell it, now it’s time to find out how to restore wood furniture. Once you’ve found out, decide how much cash you want to invest in it. Yes, you might like working on restoration challenges, but first, figure out how valuable it is to you. Especially if the piece isn’t worth any money.

Ask yourself 3 questions:
Some projects may need a few simple and cheap fixes. Others may be more complex and can make you spend way more time and money than you intended to. And this could be the first reason why the furniture was sitting on the curb for too long.
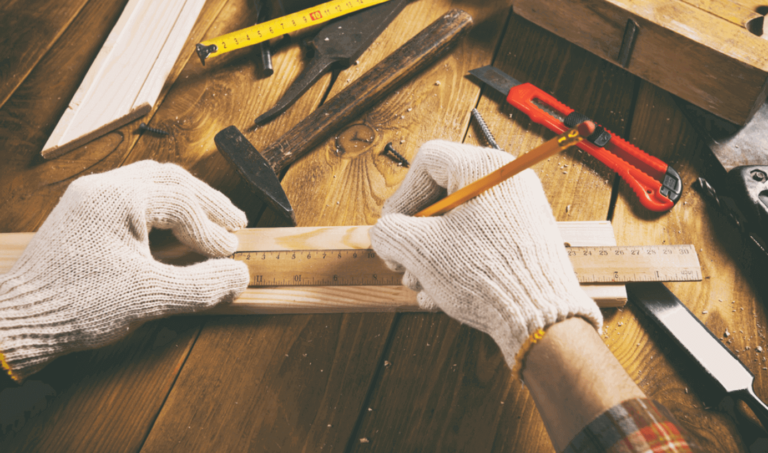
Pro Tip #4 Gather Necessary Tools
The process of restoration is pretty simple. However, there might be some options attached to it. You’ll need some tools to make your project happen.
You can take a look down the sandpaper aisle and get a variety of it from your nearby shop. It is best to buy both the somewhat rough one (80 to 120 grit) and some from the finest grades (300 to 600). Also, get a couple of putty knives, one plastic and one metal. Besides, don’t forget to pick up some 0000 steel wool and a liquid stripping gel.
You’ll need Phillips head and flathead screwdrivers for tightening joints. Also, a small hammer and rubber mallet, which allow you to adjust the wood without leaving a mark.
In addition, have the following tools on hand to restore wood furniture:
Must-Have Tools
Optional Tools
You’re ready to start your project if you have all the necessary tools and have read the article so far. Which I’m sure you did!
Furniture Restoration Training
Master the art of furniture restoration and use your skills to add value to old furniture
Furniture Restoration Training
Master the art of furniture restoration and use your skills to add value to old furniture
Pro Tip #5 Dust or Clean Before You Start
Give the piece a precise cleaning before rubbing sandpaper and paintbrush over it. As a result of years of negligence, it’s expected to have a patina of dirt or grime on it.
Often, scrubbing off the dirt and grime can expose a nice surface underneath. So perhaps, all that old wood piece needs a good cleaning and buffing to look new again.
After scrubbing the dirt off, scrub it with a sponge, some oil soap (vegetable-based), and warm water. For detailed pieces, you can use an unused toothbrush to get the nooks and crannies. To get into tight spots, get a thin wooden dowel rod, sharpen it like a pencil, and use the sharp end for digging out grime. Or use a wooden skewer.
If you need to remove some stubborn wax, go with 0000 grade, which is the finest grade available, and use a light hand. Remember, too much pressure can dull the polish.
Pro Tip #6 Repair or Replace Any Broken Parts
Now, time to evaluate the damages done to the furniture. First, you should look for two things:
Unless you count on yourself for being pretty skilful, you may need help from a professional. With complex repairs like leg replacements or architectural integrity, consider a professional.
Though, you may fix wobbly tables and chairs by tightening screws. Find the culprit by turn the piece over and inspect each leg where it meets the body to find out the culprit.
Try joining small breaks with wood glue. Feel free to fill in the tiny cracks with like-coloured wood putty.
If you plan to use stain as the finish, make sure you buy a stainable putty.
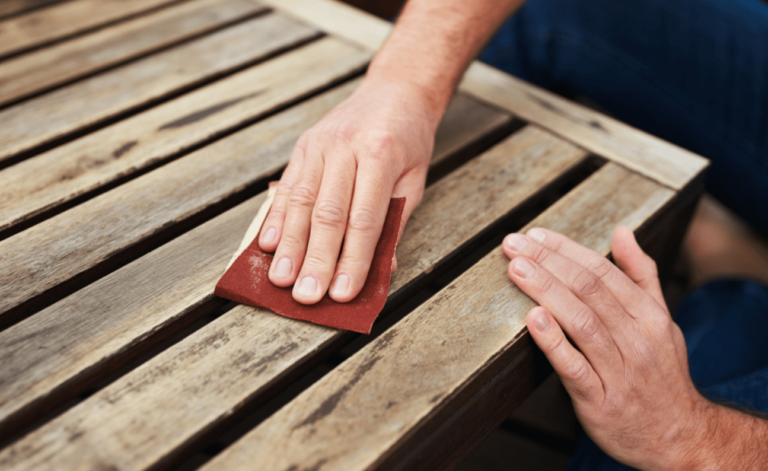
Pro Tip #7 Sand
And then comes the sanding time. Again, you might like some help from a professional unless you are okay with being very messy. The process begins with removing the finish by rubbing the sandpaper on the piece.
We recommend not to cover your sander with just any sanding paper. Grain in the sandpaper has its importance. The rule is to go from a small grain (for example, 80) to a high grain (180). The small grain paper, which is rougher, helps cut the irregularities. Then give your wood a final smoothing with the large grain paper.
If you wish to repaint your wood, settle for a 120 grain before you apply the undercoat. Then, sand it with a finer grain (180 or 240) before putting on the second coat, but only after the undercoat is dry. This ultra smoothing will make sure that your paint sits nicely on the piece.
Pro Tip #8 Paint and Varnish or Wallpaper
In the end, you can either choose the finishing of your choice, oiling or waxing. Everything depends on your requirements.
Paint
Choose a colour of your choice and apply them to your wood piece using a brush, roller, or spray.
If you choose the brush, don’t load too much paint at a time on the brush. Light strokes reduce brush strokes, so don’t put too much pressure. Remember, two light coats of paint are better than one heavy coat in case you are thinking of saving time.
If you choose the roller, then don’t compromise the quality of the roller. Instead, choose a roller with good material like wool.
Another way is spray-painting, which is an alternative to using a brush or roller. A satin or semi-gloss finish will be a better choice for wooden furniture. Choose an open area to spray paint instead of a room with a fan or in direct sunlight. Such kind of atmosphere can cause the unused paint to thicken. Check the Caution/Warning mentioned on the bottle before using.
Varnish
Once repainting your furniture is over, next, you have to decide whether you want to varnish it or not. Using a matte varnish will be ideal for the surface that gets used a lot. Also, the matte varnish will not change the surface of your fresh paint.

You can leave things like a cabinet without varnish. Because clearly, they are less exposed to blows and dents than a table. But when it comes to wood pieces like bathroom cabinets, the water-resistant varnish is a must. We recommend using the marine varnish used for boats.
Wallpaper
However, painting is not always the only way to give an old piece its life back. Wallpaper can be very handy to cover the damaged desk or brighten up the bottom of your old furniture.
Remember to paint the background in white, pasting the wallpaper. This technique will prevent the wood from peeking through. With the adhesive paper, you can skip the sanding step as well. Adhesive papers with marble effects are currently popular at the moment.
How to Restore Old Wood Furniture with Home Remedies
Wondering how to restore wood furniture with home remedies? Well, do you know that your kitchen cupboard holds some products that you can use for your wooden pieces? That’s right! Now take a look in your kitchen cupboard for products you can use for your project. Your best chances are:
Use Oils
Mix ¾ cup of canola oil and ¼ cup of White or Apple Cider Vinegar (ACV). This way, your wood pieces will look as fresh as new in no time! You can also fix scuffs by rubbing a walnut with them.
If the finish is still looking dull, take some wood reviver onto a cotton cloth and buff firmly.
One such remedy that works for refinishing old wood furniture is to mix:
Finally, give it a coat of beeswax polish, and that should be enough to bring it back to life.
Use Vinegar
To stain the wood a darker yet still more natural colour, give vinegar a try!

Use either Balsamic Vinegar or Apple Cider Vinegar, depending on your preference. Follow this excellent wood DIY to know how to restore wood furniture with vinegar and take it to the next level! Balsamic vinegar or Apple Cider Vinegar gives the wood a natural-looking and darker stain.
Use Toothpicks, Wooden Skewers and Apple Sticks
Toothpicks or wooden skewers, and apple sticks will ram into nail holes. They look chicer than filling gaps or holes with glue. To make the sticks look like they are part of the wooden furniture, sand them down to even out the surface.
Complications in The Restoration of Old Furniture
Many people claim to get this process done by themselves. Yet, they are usually unaware of the hidden complications that one has to go through. If not handled properly, wood items can cause many problems and mess. Besides, it can induce hurt in your sentimental value.
So, to make you prepared, here are some of the common complications one might face in the way of restoring the wood:
To avoid all the complications, check out the course Furniture Restoration Training by CourseGate.
Conclusion
Over some years, most people contemplate throwing damaged furniture away. Luckily, another option exists for those who know how to restore wood furniture. And guess what, you are one of them. Now you know the process, which doesn’t need years of experience and skill.
You shouldn’t worry if you are aware of the type of wood you’re working with; it is always safe to have an expert by your side.
Furniture Restoration Training
Master the art of furniture restoration and use your skills to add value to old furniture
Diploma in Furniture Restoration
Master the art of furniture restoration and use your skills to add value to old furniture


August 12, 2024


- All Courses
- Accounting & Finance60
- Admin, Secretarial & PA45
- Audio Books (Audio Course)100
- Business Skills157
- Design76
- Digital Marketing49
- DIY (Do It Yourself)58
- Employability244
- Food Hygiene & Safety18
- Health & Fitness68
- Health & Safety110
- Health & Social Care186
- Human Resource50
- It & Software Skills116
- Language27
- LIFESTYLE88
- MAKEUP & BEAUTY49
- Management130
- Marketing62
- Massage & Physiotherapy17
- Microsoft Office64
- Nonprofit & Charity36
- On Demand Courses54
- Personal Development127
- Photography34
- Psychology & Counselling98
- SEN (Special Educational Needs)24
- Teaching and Education98